About Me

My photo
Colorado Springs, CO
Hey Everyone!! I'm Erika. I'm a 28 year old, fashion loving, food blogging, midwestern girl! I grew up on hearty meals and enjoying the simple life of South Dakota. Ever since leaving home I have found a love for baking and cooking. I started this blog for my family and friends so that they can see how food blog recipes REALLY turn out. When I'm not too busy running the fashion world and have time for the blogging world, I will try to update the blog weekly. I am not a professional and probably never will be, so don't expect too much from me. :) I just love to have fun, get messy and make the simple things. ENJOY!

Sunday, October 16, 2011

Pumpkin Roll With Cream Cheese Filling

This recipe is one that I have been wanting to try for a long time!! Both of my parents make it every Thanksgiving and Christmas but I always thought it would be way too hard for a rookie baker like myself. Come to find out, this recipe is SIMPLE and EASY!!!

I needed a good fall dessert to take over to some friends of ours for dinner the other night and I thought, "What the heck! Here goes nothing!". To my surprise is was something and that something was devoured in about 20 mins. The recipe makes a pretty nice size roll but once you start eating it, you can't stop!

There isn't one thing that I would change about this recipe and I feel for my first attempt, it was a success! Leave me a comment on how it turns out for you and ENJOY!!


Ingredients: (Keep in mind, some ingredients are listed twice. This is because you will use some twice in two different steps)

  • 1/4 cup powdered sugar (to sprinkle on towel)
  • 3/4 cup all-purpose flour
  • 1/2 teaspoon baking powder
  • 1/2 teaspoon baking soda
  • 1/2 teaspoon ground cinnamon
  • 1/2 teaspoon ground cloves
  • 1/4 teaspoon salt
  • 3 large eggs
  • 1 cup granulated sugar
  • 2/3 cup LIBBY'S® 100% Pure Pumpkin
  • 1 cup walnuts, chopped (optional)
  • 1 (8 ounce) package cream cheese, softened
  • 1 cup powdered sugar, sifted
  • 6 tablespoons butter or margarine, softened
  • 1 teaspoon vanilla extract
  • 1/4 cup powdered sugar (optional)


Step One:
Preheat oven to 350 degrees. Grease a 15 x 10 inch jelly roll pan, line it with wax paper and set it aside.
 
Step Two:
Combine flour, baking powder, baking soda, cinnamon, cloves and salt in a small mixing bowl and set aside. 

Step Three:
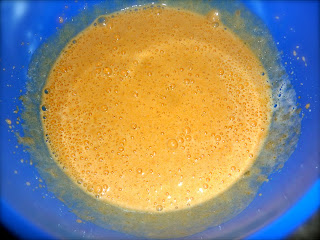
Beat eggs and sugar in a large mixing bowl until the mixture becomes thick. Add pumpkin and beat until combined. Add the flour mixture to the egg/sugar mixture and stir together until completely mixed.


Step Four:
Pour pumpkin mixture onto pan that is lined with wax paper. Put into the oven and bake for about 10-15 mins. (While this is baking..jump to the next step!!) It does not take long for the cake to cook and should be taken out of the oven when you are able to touch it and it springs back.


Step Five:
While the cake is baking, place a clean kitchen towel onto the counter and sprinkle with powder sugar. The more evenly spread out the sugar is, the easier it will be to peel off the cake later on.

Step Six:
Once the cake is done, loosen edge and flip onto towel. Slowly peel off wax paper.


Step Seven:
Slowly roll the towel into the cake to form a "roll". Start with the narrow side, not the longest side. Place onto a cooling rack and let it COMPLETELY cool off!! This is important because if you spread the cream cheese while the cake is still warm, it will make your filling runny and will soak right through. (I was in a hurry so I placed mine in the freezer for 15 mins.)


Step Eight:
While the roll is cooling off beat cream cheese, powder sugar and vanilla until smooth and creamy. Set aside until you are able to spread onto pumpkin cake.


Step Nine:
Once the roll has completely cooled off, slowly unroll it. Spread the cream cheese evenly over the pumpkin roll.

Step Ten:
Once the cream cheese is evenly spread out, slowly start rolling up the cake again while pulling the towel off. Make sure to do this step slowly because the towel will stick to the cake and the cake also tends to crack. Place onto a plate and refrigerate for an hour before serving.

Step Eleven:
Before serving, remove from refrigerator, sprinkle with powder sugar and ENJOY!!


Original Recipe:
http://allrecipes.com/Recipe/libbys-pumpkin-roll-with-cream-cheese-filling/detail.aspx

Halloween Polka Dot Cake

I have been wanting to make this cake for about a month and I finally had a good reason to whip it up! A coworker of mine had her birthday on Saturday and I knew this would be a winner! There are a few things that I did differently that I would have changed but for the most part, it came out pretty "boootacular".

The only way this recipe would have been easier is if I had a cake pop pan! The original recipe called for a cake pop maker but a. those are expensive and b. they are hard to find. I made a sheet cake and formed little round balls but I think a cake pop pan would be perfect for this and they are relatively inexpensive.

I can tell you that this was the most fun I have had making a cake in a long time and it mainly came from the fact that Halloween is a fun holiday to decorate for!! :) I also believe that if and when I make this cake again, I will get better. Let me know how it turns out for you..ENJOY!!

Ingredients:
1 box of white cake mix
1 box of devils food cake mix
DEPENDING ON WHAT CAKE MIX YOU BUY, YOU WILL NEED THE INGREDIENTS LISTED ON THE BACK OF THE BOX.
Frosting (I used white so that I could die it orange. I think chocolate would be cute too!!)
Food dye- yellow/red/black (Optional)

Step One:
Preheat oven. Prepare white cake mix as directed on back of box. Add food dye (yellow + red = orange) until you get the desired orange. Place into oven until fully baked. (Depending if you are using a cake pop pan/maker or making a sheet cake like me, this step could change for you. )


Step Two:
Once "orange" cake is done cooking, remove from oven and grab your melon baller. With the melon baller, press into sheet cake and make small spheres. You want one side to be flat so that you can press them onto the sides of the pan. If you don't have a melon baller, I used my hands and formed little balls (it worked but not as great as it could have been). I ended up using about 3/4 of a sheet cake for all my cake balls.


Step Three:
Mix up the devils food cake mix as directed on the back of the box. Once it is ready to go, pour about 1/4-1/3 of it into the bottom of a deep circle cake pan. Take cake balls and dip into the chocolate cake mix, stick them to the side of the cake pan and also place some in the middle of the cake mix. Pour more devils food on top of this layer and repeat until everything is used up.  (if you want to make a two layer cake, you could also do this step but in smaller increments)


Step Four:
Put cake into oven at the temperature that is listed on the back of the devils food cake mix box. It will take about 15-20 mins longer than it would for a normal cake to bake. Mine took about 60 mins to fully bake.

Step Five:
Once cake is done baking, let cool for about 10 mins, loosen edges with a knife and flip onto a cooling rack. Once cake has completely cooled off, ice the cake with whatever frosting you want and decorate it!! Now all you have left to do is dig in and ENJOY!!


Original Recipe:
http://go.tipjunkie.com/ha/147/snowybliss.blogspot.com/2011/09/polka-dot-cake.html